
Configuring Quality of Service Using MQC
Oct 17, 2017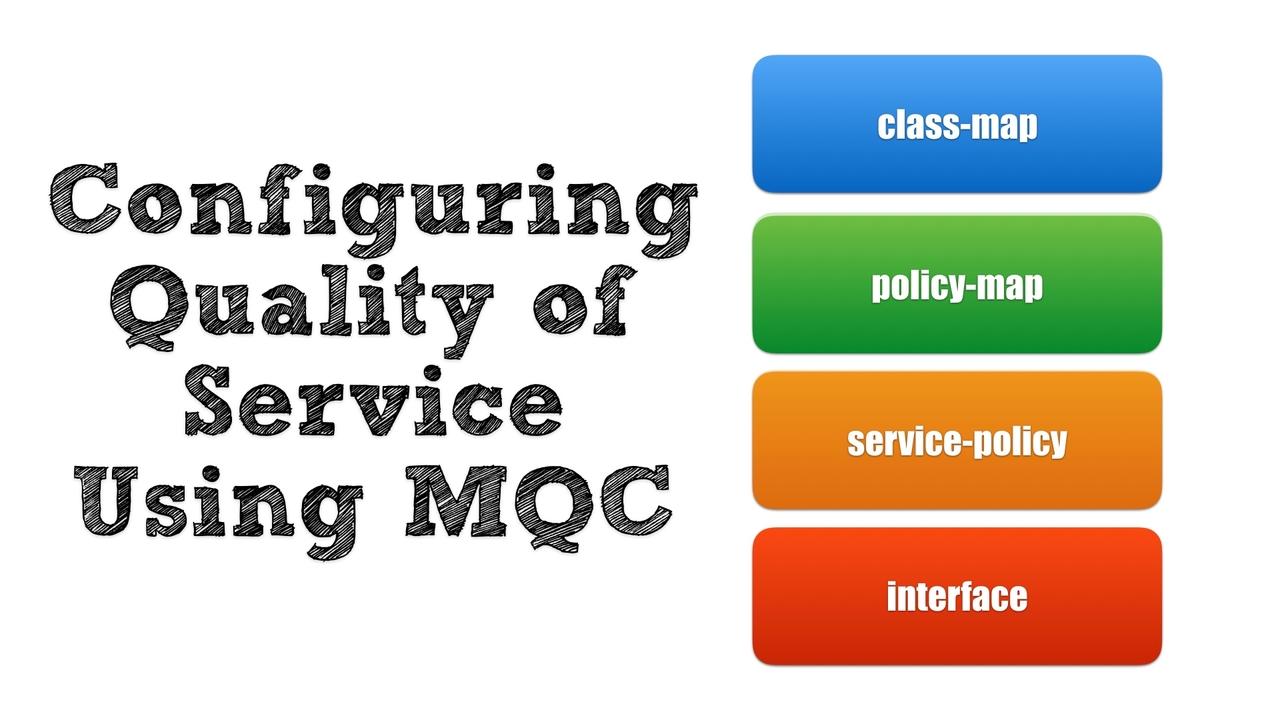
The Need to Know MQC in a World of Automation
These days, Quality of Service (QoS) can be configured relatively easy. If we’re using the APIC-EM as a network controller to manage our routers and switches, we can simply point and click our way through the EasyQoS utility and have a very robust QoS configuration applied to our devices. Even at the command line interface (CLI) of a router a switch, we could invoke the power of AutoQoS VoIP (to optimize QoS settings for voice traffic, or (just on routers) AutoQoS for the Enterprise (to discover network traffic patterns and create a customized QoS configuration to reflect our network’s specific characteristics).
However, what if you need to make an adjustment to such dynamically generated QoS settings? If you examine the underpinnings of any of these QoS automation tools, you’ll see they all use the same approach to configure most (of not all) of their QoS settings. This approach is called Modular QoS CLI, or MQC for short. So, even if you intend to use automated QoS tools for the bulk of your configurations, I still posit you need to have an understanding of the MQC approach to QoS configuration, in the event you need to modify, or simply better understand, one of your autogenerated QoS configurations.
That’s the goal of this blog post, to give you a better understanding of the 3-step process involved in configuring QoS using MQC. Also, this post will equip you with collection of verification and troubleshooting commands.
Examples of QoS Features Configurable with MQC
The main reason knowledge of MQC is critical for network professionals is that MQC is the way we configure almost all of our QoS features (with the rare exception of something like a Link Fragmentation and Interleaving (LFI) configuration, which does not use MQC). Consider some of the QoS features that can be configured using the MQC approach:
- Classification: Classification recognizes specific traffic types, based on a wide spectrum of criteria. This could be as simple as recognizing Telnet traffic by recognizing TCP segments using Telnet’s well-known port number of 23. Or, this could be as advanced as using Network-Based Application Recognition (NBAR), which has the ability to perform deep packet inspection and recognize the signatures of many applications.
- Marking: After classifying traffic, it can be marked by altering bits to indicate that traffic’s priority. For example, at Layer 2, we could use a Class of Service (CoS) marking. A CoS marking uses three bits to indicate a frame’s priority, resulting in a range of possible CoS values of 0 through 7. Interestingly, Cisco forbids us to use values of 6 or 7 (with the exception of protocols such as OSPF required for network operation), meaning that we should mark our highest priority traffic (e.g. voice traffic) with a 5. At Layer 3, we could mark traffic with either an IP Precedence or a Differentiated Services Code Point (DSCP) marking. While IP Precedence has the same 3-bit limitation as CoS, DSCP uses 6 bits to indicate a packet’s priority. That results in 64 possible priority values (in the range 0 – 63). While we could specific decimal values to indicate a DSCP value in our configuration, the IETF standards body has selected and named 21 of these 64 values. These named DSCP values are called Per-Hop Behaviors (PHBs), and it’s a best-practice recommendation to use these pre-selected values in our configuration.
- Congestion Management: Even if we go to the trouble of classifying and marking traffic, that doesn’t necessarily mean that we’ve impacted the behavior of that traffic. Specifically, we need to have one or more other QoS mechanisms that can look at those markings, and make a decision (e.g. a forwarding decision or a dropping decision) based on those markings. One such mechanism is congestion management, also known as queuing. To illustrate the importance of queuing, let’s pretend a router is receiving traffic from a LAN connection at a rate of 1 Gbps and trying to send that traffic out on a relatively slow-speed WAN link (e.g. 10 Mbps). In response to this massive speed mismatch, a router can allocate some of its memory (i.e. a buffer or a queue) to temporarily store packets that cannot be immediately sent due to the lack of WAN bandwidth. Then, in a moment, when that WAN bandwidth becomes available, the router can selectively take packets out of its queue and send them on their way. The process of storing packets and determining in what order to forward packets out of that queue is called queuing. While Cisco routers support a myriad of queuing mechanisms, the two you’re most likely to encounter are Class-Based Weighted Fair Queuing (CB-WFQ) and Low Latency Queuing (LLQ). CB-WFQ allocates minimum amounts of bandwidth for various traffic classes. LLQ enhances CB-WFQ, by adding a priority queue for traffic such as voice and video. Packets placed in the priority queue get sent ahead of other packets, up to a limit (i.e. a priority queue refrains from continual transmission, which could otherwise starve out other traffic types).
- Congestion Avoidance: When a queue fills to capacity, bad things happen. Not only do low priority and high priority traffic flows alike get rejected as they attempt to place their packets in the queue, something even more insidious occurs. Specifically, when a segment, as part of a TCP flow, is dropped, the TCP session will assume it’s sending too aggressively, and reduce its window size (i.e. the number of segments it sends before pausing and waiting to receive an acknowledgement of receipt from the far end of the conversation). This behavior is called TCP Slow Start. It then follows that if a queue is completely full, all TCP flows almost simultaneously go into TCP Slow Start, causing a massively inefficient use of bandwidth commonly referred to as Global Synchronization or TCP Synchronization. To combat the ill effects of a queue filling to capacity, we can use a mechanism such as Weighted Random Early Detection (WRED) to keep an eye on queue depth. As WRED detects a queue is starting to fill up, it can introduce the possibility that packets with specific markings might be dropped. This probably increases along with queue depth, preventing a queue from every completely filling to capacity. Packets with different markings (i.e. different weightings) can take on different drop probabilities. However, a downside to WRED is its aggressiveness in causing a TCP flow to reduce its window size (i.e. the fact that it’s dropping packets). A kinder and gentler approach would be to politely ask the far size of a TCP flow to voluntarily reduce its window size, as opposed to forcing it into TCP Slow Start by dropping one or more packets. This approach is possible through the use of Explicit Congestion Notification (ECN), which can be added to our configuration after we fist configure WRED.
- Traffic Conditioning: While we sometimes want to guarantee a minimum amount of bandwidth for our traffic, there are other times we want to set a speed limit on specific traffic types (e.g. network gaming traffic). The QoS mechanisms that let us set such speed limits are called Traffic Conditioners, and two traffic conditioners configurable using MQC include policing and shaping. While policing and shaping each limit the amount of bandwidth available to specific traffic classes, policing, by default, discards packets exceeding the configure bandwidth limit. Conversely, shaping stores such excess packets in a queue, and when bandwidth becomes available, that traffic is taken out of the queue and transmitted. Think of it this way: Policing (by default) drops excess traffic, while Shaping delays excess traffic.
- Link Efficiency: Link efficiency mechanisms, which help us make the most efficient use of the bandwidth available on a slow WAN link, are less important today than they were a few years ago. They were extremely valuable when our WAN link speeds hovered around 768 kbps (or less). For example, RTP Header Compression (cRTP) could reduce the overhead of packets making up a voice conversation, reducing the 40 Bytes of a combined IP, UDP, and RTP header to only 2 or 4 Bytes. However, Cisco recommends that we only use cRTP on link speeds less than 2 Mbps. So, its usefulness diminishes as our link speeds climb higher.
MQC Configuration
Now that we have a basic understanding of some of the QoS features configurable with MQC, let’s go through an example where we actually use MQC to configure a router with a collection of these features.
The first thing to understand about MQC is that it’s performed in three distinct steps:
- Step #1 creates a collection of one or more Class Maps, which classify different types of traffic into different “buckets.” By the way, Cisco cautions us not to create more than eleven of these Class Maps for any one interface. Also be aware that there is one Class Map we have by default, and it’s named class-default. We cannot (nor would we want to) delete this pre-existing Class Map.
- Step #2 creates a Policy Map, which specifies the QoS settings applied to each class of traffic.
- Step #3 applies a Policy Map (typically, but not always, to an interface). The application of the Policy Map also specifies the direction in which the Policy Map is applied, meaning that it’s conceivable an interface would have two Policy Maps applied, one in the inbound direction and one in the outbound direction.
This example illustrates a sample configuration using these three steps:
Step 1: Create One or More Class Maps
HQ-ROUTER#conf term
Enter configuration commands, one per line. End with CNTL/Z.
HQ-ROUTER(config)#class-map match-any EMAIL
HQ-ROUTER(config-cmap)#match protocol exchange
HQ-ROUTER(config-cmap)#match protocol pop3
HQ-ROUTER(config-cmap)#match protocol smtp
HQ-ROUTER(config-cmap)#match protocol imap
HQ-ROUTER(config-cmap)#exit
HQ-ROUTER(config)#
The above Class Map name of EMAIL is case-sensitive, and I personally use the practice of capitalizing the names of all Class Maps and Policy Maps I create. That lets mean quickly spot things in the configuration I’ve named, as opposed to some Cisco IOS keyword. Also, notice the use of the match-any option. This tells the Class Map that a packet will be classified into this Class Map if it meets any of the matching criteria. By default, a Class Map uses the Boolean logic of match-all, meaning that in order to be classified in a Class Map, a packet would have to match each of the specified criterion. In this example, however, a variety of e-mail packet types are classified into this one Class Map. Also, note the protocol keyword used as part of the match command. That keyword uses NBAR to recognize the signature of the specified protocol.
HQ-ROUTER(config)#class-map VOICE
HQ-ROUTER(config-cmap)#match protocol rtp audio
HQ-ROUTER(config-cmap)#exit
HQ-ROUTER(config)#
In our second Class Map, we’re classifying voice over IP (VoIP) traffic. Notice the absence of the match-any or match-all qualifier in the class-map command. As mentioned previously, the default logic is match-all. However, since we have only one match criterion in this Class Map, there’s no need to specify any alternate logic. Finally, notice the keyword of audio in the match command. This qualifier helps us categorize just VoIP traffic into the VOICE class, since video streams also use Real-Time Protocol (RTP).
HQ-ROUTER(config)#class-map match-any WEB
HQ-ROUTER(config-cmap)#match protocol http
HQ-ROUTER(config-cmap)#match protocol secure-http
HQ-ROUTER(config-cmap)#exit
HQ-ROUTER(config)#
In our third Class Map, we’re categorizing both HTTP and HTTP traffic into the WEB Class Map.
HQ-ROUTER(config)#class-map SCAVENGER
HQ-ROUTER(config-cmap)#match protocol bittorrent
HQ-ROUTER(config-cmap)#exit
Although BitTorrent is used for many legitimate purposes, let’s assume that in this example, we’ve had issues with employees illegally downloading movies using BitTorrent, and we want to restrict it’s bandwidth.
Step 2: Apply QoS Policies to Class Maps Using a Policy Map
HQ-ROUTER(config)#policy-map DEMO
HQ-ROUTER(config-pmap)#class EMAIL
HQ-ROUTER(config-pmap-c)#bandwidth 512
HQ-ROUTER(config-pmap-c)#random-detect dscp-based
HQ-ROUTER(config-pmap-c)#random-detect ecn
HQ-ROUTER(config-pmap-c)#exit
We begin by creating a Policy Map named DEMO. From there, we use the class command to enter policy-map-class configuration mode for the Class Maps we configured in Step #1. First, we go into policy-map-class configuration mode for the EMAIL Class Map. The bandwidth command (which enables the CB-WFQ queuing feature) uses kbps as its unit of measure, and here’s what the bandwidth 512 command is saying: "Give this class of traffic at least 512 kbps of bandwidth if it needs that much, and give it more if it needs more, and more is available." The random-detect dscp-based command enables WRED, and tells WRED to make its packet dropping decisions based on packets’ DSCP values, as opposed to IP Precedence values. Note that the random-detect command cannot be given to a class of traffic until you first apply the bandwidth command to the traffic class. The random-detect ecn command is then used to enable WRED’s Explicit Congestion Notification feature.
HQ-ROUTER(config-pmap)#class VOICE
HQ-ROUTER(config-pmap-c)#priority 256
HQ-ROUTER(config-pmap-c)#exit
Next, we enter policy-map-class configuration mode for the VOICE class of traffic. The priority 256 command (which enables the LLQ queuing feature) is saying: "Give this class of traffic 256 kbps of bandwidth, but no more, and send packets in this class ahead of other packets."
HQ-ROUTER(config-pmap)#class WEB
HQ-ROUTER(config-pmap-c)#bandwidth 768
HQ-ROUTER(config-pmap-c)#random-detect dscp-based
HQ-ROUTER(config-pmap-c)#random-detect ecn
HQ-ROUTER(config-pmap-c)#exit
Next, we configure CB-WFW for the WEB class of traffic, using the same basic commands (with the exception of bandwidth amount) as we used for the EMAIL traffic class.
HQ-ROUTER(config-pmap)#class SCAVENGER
HQ-ROUTER(config-pmap-c)#police 128000
HQ-ROUTER(config-pmap-c-police)#exit
HQ-ROUTER(config-pmap-c)#exit
HQ-ROUTER(config-pmap)#exit
Finally, we use the police 128000 command on the SCAVENGER traffic class (i.e. the traffic class containing the BitTorrent traffic). Interestingly, the units of measure for the police and shape commands is bps, as opposed to kbps used by CB-WFQ and LLQ. This command says: "Drop any traffic in the SCAVENGER class that exceeds 128 kbps of bandwidth."
Step 3: Apply the Policy Map
HQ-ROUTER(config)#int gig 0/1
HQ-ROUTER(config-if)#service-policy output DEMO
HQ-ROUTER(config-if)#end
HQ-ROUTER#
While we can get fancy, and do things like nesting one Policy Map inside another, we commonly (as is this example) apply a Policy Map to an interface. Here, we’re applying the Policy Map named DEMO to packets leaving (i.e. coming out of) interface Gig 0/1.
MQC Verification
Let’s consider the three primary commands used to verify and troubleshoot an MQC configuration:
show class-map
This command displays information about the Class Maps configured on the router, along with information about what traffic types are classified in each Class Map. Here’s the output from our example:
HQ-ROUTER#show class-map
Class Map match-any class-default (id 0)
Match any
Class Map match-any EMAIL (id 1)
Match protocol exchange
Match protocol pop3
Match protocol smtp
Match protocol imap
Class Map match-any WEB (id 3)
Match protocol http
Match protocol secure-http
Class Map match-all VOICE (id 2)
Match protocol rtp audio
Class Map match-all SCAVENGER (id 4)
Match protocol bittorrent
HQ-ROUTER#
Notice that the output also shows us the class-default Class Map, which we have by default. You can think of this as a “catch all” Class Map, meaning that if you don’t explicitly classify a packet into a Class Map you create, it will be classified into the class-default Class Map.
show policy-map
This command shows what policies (i.e. specific QoS features and settings) are applied to our Class Maps. Here’s the output from our example:
HQ-ROUTER#show policy-map
Policy Map DEMO
Class EMAIL
bandwidth 512 (kbps)
packet-based wred, exponential weight 9
random-detect ecn
dscp min-threshold max-threshold mark-probablity
----------------------------------------------------------
default (0) - - 1/10
Class VOICE
priority 256 (kbps)
Class WEB
bandwidth 768 (kbps)
packet-based wred, exponential weight 9
random-detect ecn
dscp min-threshold max-threshold mark-probablity
----------------------------------------------------------
default (0) - - 1/10
Class SCAVENGER
police cir 128000 bc 4000
conform-action transmit
exceed-action drop
HQ-ROUTER#
show policy-map interface interface_id
This is my favorite QoS verification command, because it shows us the combined information we saw in the two previous show commands. Also, it gives us counts for how many packets and how many Bytes have been classified by each Class Map. Here’s the output from our example:
HQ-ROUTER#show policy-map interface gig 0/1
GigabitEthernet0/1
Service-policy output: DEMO
queue stats for all priority classes:
Queueing
queue limit 64 packets
(queue depth/total drops/no-buffer drops) 0/0/0
(pkts output/bytes output) 0/0
Class-map: EMAIL (match-any)
0 packets, 0 bytes
5 minute offered rate 0000 bps, drop rate 0000 bps
Match: protocol exchange
0 packets, 0 bytes
5 minute rate 0 bps
Match: protocol pop3
0 packets, 0 bytes
5 minute rate 0 bps
Match: protocol smtp
0 packets, 0 bytes
5 minute rate 0 bps
Match: protocol imap
0 packets, 0 bytes
5 minute rate 0 bps
Queueing
queue limit 64 packets
(queue depth/total drops/no-buffer drops) 0/0/0
(pkts output/bytes output) 0/0
bandwidth 512 kbps
Exp-weight-constant: 9 (1/512)
Mean queue depth: 0 packets
dscp Transmitted ECN Random drop Tail drop Minimum Maximum Mark
pkts/bytes marked pkts/bytes pkts/bytes thresh thresh prob
Class-map: VOICE (match-all)
0 packets, 0 bytes
5 minute offered rate 0000 bps, drop rate 0000 bps
Match: protocol rtp audio
Priority: 256 kbps, burst bytes 6400, b/w exceed drops: 0
Class-map: WEB (match-any)
0 packets, 0 bytes
5 minute offered rate 0000 bps, drop rate 0000 bps
Match: protocol http
0 packets, 0 bytes
5 minute rate 0 bps
Match: protocol secure-http
0 packets, 0 bytes
5 minute rate 0 bps
Queueing
queue limit 64 packets
(queue depth/total drops/no-buffer drops) 0/0/0
(pkts output/bytes output) 0/0
bandwidth 768 kbps
Exp-weight-constant: 9 (1/512)
Mean queue depth: 0 packets
dscp Transmitted ECN Random drop Tail drop Minimum Maximum Mark
pkts/bytes marked pkts/bytes pkts/bytes thresh thresh prob
Class-map: SCAVENGER (match-all)
0 packets, 0 bytes
5 minute offered rate 0000 bps, drop rate 0000 bps
Match: protocol bittorrent
police:
cir 128000 bps, bc 4000 bytes
conformed 0 packets, 0 bytes; actions:
transmit
exceeded 0 packets, 0 bytes; actions:
drop
conformed 0000 bps, exceeded 0000 bps
Class-map: class-default (match-any)
0 packets, 0 bytes
5 minute offered rate 0000 bps, drop rate 0000 bps
Match: any
queue limit 64 packets
(queue depth/total drops/no-buffer drops) 0/0/0
(pkts output/bytes output) 0/0
HQ-ROUTER#
Summary
While an in-depth study of each QoS feature mentioned in this post would fill an entire course, the goal of this post was to introduce you to the 3-step MQC process and to give you a passing familiarity with many of the QoS mechanisms configurable with MQC. Equipped with this knowledge, my hope is that you’re now better able to interpret the auto-generated QoS configs you encounter.

Kevin Wallace, CCIEx2 (R/S and Collaboration) #7945

